Transcript
In the last episode you heard the story of twin sisters and Co-founders, Karen and Sharon Benoit. They’ve weathered several storms throughout their lives both literally and figuratively. Their latest storm comes in the form of a paperwork audit. Thankfully, an old friend, Camille comes to the rescue by introducing them to the Kasennu framework for creating business infrastructure. With the repeat audit on the horizon, time is of the essence.
Camille helps her friends create a paper records management system that not only consolidates information across their three locations, but also includes archival and offsite storage protocol.
I’m Alicia Butler Pierre, and I’m about to teach you the same techniques Camille used to help the Benoit sisters. Do you remember what you learned in creating an electronic records management system? Well, by the end of this episode, you’ll know how to create a paper-based version that’s not only compliant, but also protects your company’s physical assets. Class is back in session.
This is Season 15, Episode 189. How to Create a Paper Records Management system.
Let’s start the show.
Welcome to Business Infrastructure, the podcast about curing back-office blues of fast-growing businesses. If you’re a business owner or operator looking for practical tips and solutions to scaling your business in a sustainable manner, you’re in the right place. Now here’s your hostess, Alicia Butler Pierre.
Before we get into the details, I sense the need to justify why we’re about to talk about managing paper records. After all, we’re in the digital age. So why are paper files even necessary? Well, simply put, there’s certain paperwork that must be maintained as an original hard copy, depending on the nature of the document, you could legally be required to keep paper records for a defined period of time or indefinitely.
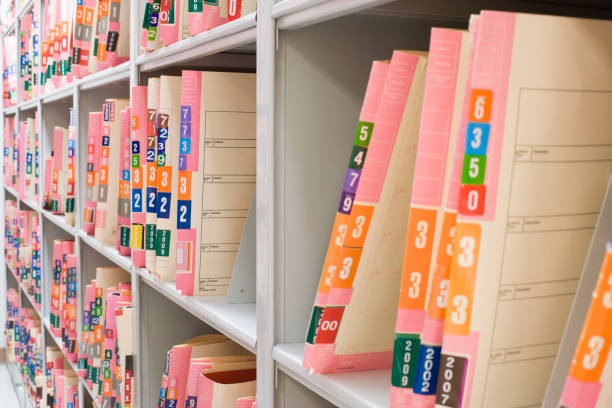
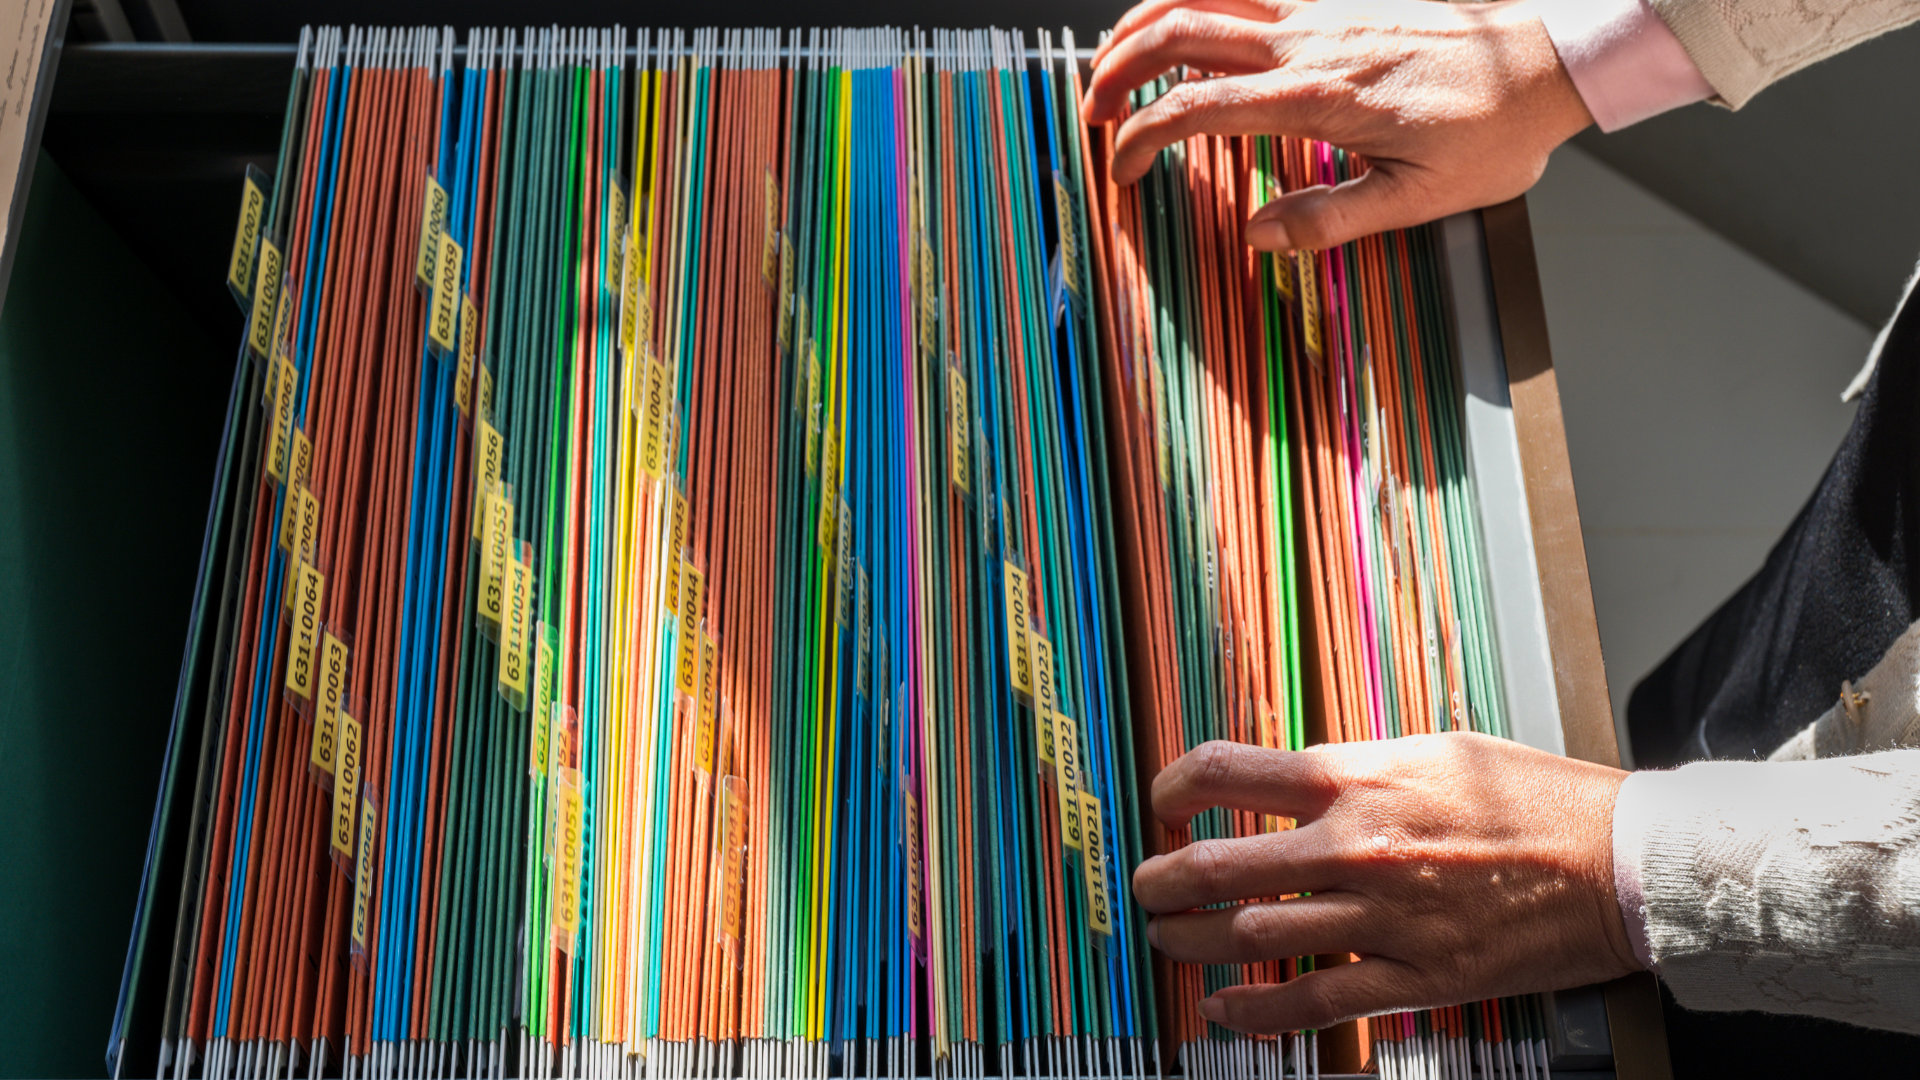
If you recall, Karen and Sharon Benoit, run a mental rehabilitation facility where they keep physical records of their patients and they were bursting at the seams. Keep in mind, they already lost many records in the past due to a hurricane. So they needed a way to manage the files, taking up physical space without putting their compliance or their patients for that matter at risk. That’s why a paper records management system is so important.

What is a paper records management system? Before I define what it is, please note that throughout this lesson, I’m going to use the words paper, physical and file interchangeably. Now back to our definition, a paper records management system links the processes, technologies, and the people needed to create, name, categorize, store, scan, and purge physical data in an organized manner. It represents the fourth element of the Kasennu framework for business infrastructure. As a reminder, if you are a new listener to this show, business infrastructure is a system for linking people, processes and tools into a cohesive framework that allows you to scale your business sustainably and profitably.
There’s 10 steps I’ll describe for creating a paper records management system. Similar to previous lessons, keep in mind that the information you’re about to hear will be at a high level. You’ll also notice many parallels of the steps described in creating an electronic records management system. So without any further ado, let’s get started.
Step 1, as in all of our previous lessons, is to prepare and here is a list of the things that you’ll need in preparation of your paper records management system.
First, you’ll need a set of new blank index cards. We’re not going to worry about trying to reuse those index cards from your previous business parts analysis exercise. Let’s just go ahead and start with a brand new set of blank index cards. You’ll also need rubber bands, stickers, which I will explain later. And that is optional by the way, the stickers. You’ll also need at least three different color markers or pins. You’re also going to need several banker’s boxes or file storage boxes, hanging file folders, the smead viewable labeling system. And I will explain what that is later, again, that’s another product that is optional. You don’t have to have that, but it’s a product that I actually really like and it’s something that I prefer to use, but you certainly don’t have to.
It also be nice if you have a camera, you can use something as simple as the camera on your smartphone, because we’re going to be taking before and after pictures with this exercise, you’ll also need a computer, laptop or tablet access to either Microsoft Excel or Google sheets, some type of spreadsheet software, as well as that large table again, or any large flat surface.
And then finally, the people that you want to participate in this exercise. If you are in an actual commercial office space, it’s very likely that you might be in a suite. You might have access to the entire building, or you could just be working from home or might have a very tiny workspace within your home, whatever the case, if there are other people involved, either in your office or your workspace or your suite, make sure you get them involved in this exercise as well.
Step number 2, take an inventory of all of your paper records. But before you do that, take pictures of each office or workspace that has these different types of paper records. And let me explain what I mean by a paper record. That could include everything from paper files, as well as books, periodicals, you know, things like magazines, newspapers, anything that’s in a paper format. We’re going to consider all of that collectively as paper records.

Now, what I want you to do, you and everyone else who is participating in this exercise with you is to write the name of each type of record onto a separate index card. And you’re actually going to do this twice. For example, instead of writing the name of each book you have, which could probably be an incredibly tedious exercise. If you’re like me and you love books and you, you have your own personal library. So instead of writing the name of each book, you would just simply write the word book or books onto an index card. And I want you to actually write that twice because you’re going to use one set of index cards for a certain exercise, and you’ll use the other set of index cards that you write on to actually start to label those different banker’s boxes or file storage boxes that you have.
Now, when you write the name of each type of paper record onto those two index cards at a time, make sure you use the same color ink. That way you’ll know that whenever you see that particular color ink on an index card, that it indicates that it is in fact the name of that file type.
Step 3, categorize your file types by department. Now, if you recall during that business parts analysis exercise, you actually identified your company’s departments. And if you don’t know what I’m talking about, when I mentioned the business parts analysis exercise, make sure you go back and check out Episodes 182 and 183, if you haven’t listened to those already. But if you have, then you already know the names of your departments by this point.
So go ahead and write the name of each department on two different index cards as well. And what you’ll do now is take one set of your index cards that has all of your company’s department names. And you’re going to spread them across that large flat surface or large table horizontally you’re then going to place the index cards containing the name of each type of paper record underneath the department or the index card with a department name on it, that that file type is most closely associated with. So for example, if you previously identified that your company has a management department, then any books that you might have on leadership and strategy, you might associate with that department.
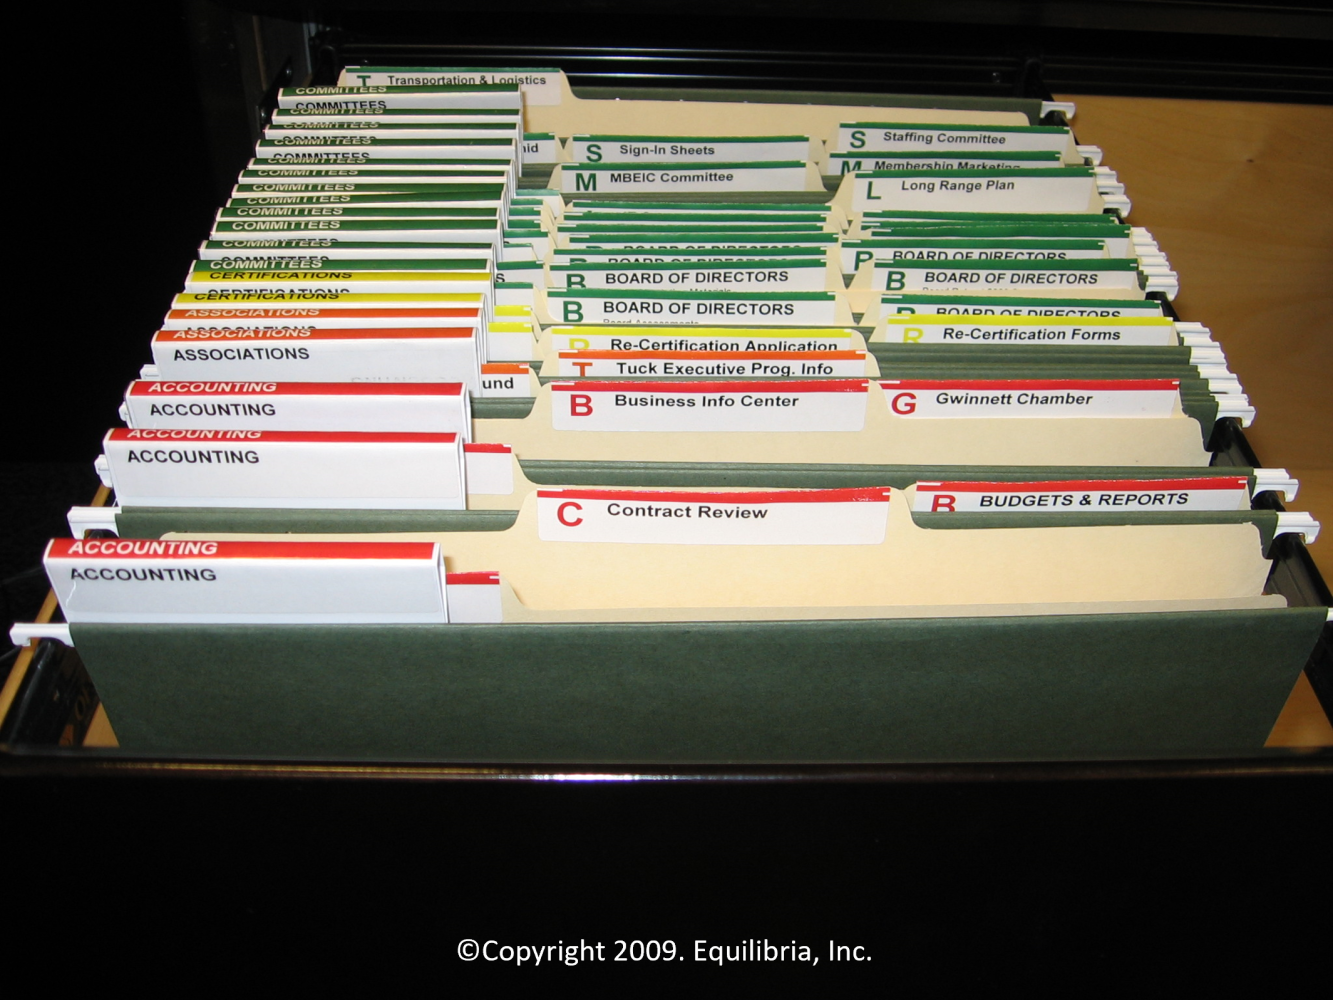
And here’s another quick tip to include about writing down something as broad as books as a type of paper record. If you want to get a little bit more specific, but not too granular, as we mentioned earlier, you’d certainly don’t want to write the name of every single book that you have onto these different index cards, but maybe you might want to consider categorizing the types of books. So if you have books that are again about leadership, strategy, sales, marketing, finance, operations, whatever the case may be, that’s another way that you can get a little bit more specific without getting too terribly bogged down into the details. So go ahead and every single file type that you’ve identified, go ahead and assign it to a proper category.
Step four, determine file access: private versus public. Now this is going to be very similar in nature to what we talked about when developing an electronic records management system. But the difference here is you can use stickers again. So if you have a closed padlock sticker and you can create these yourself, but again, you don’t have to do this, but that would indicate any file type that is private and would require special access. And if you have a sticker that happens to represent an open padlock that is indicative of a public file.

In other words, things or information that pretty much anyone in the company can have access to. If you don’t have stickers, don’t worry about it. You don’t have to use stickers. You can always use a different color ink at this point, and you’ll just write the word private or public on every single one of those index cards representing a paper file type.
Now here’s where your business design blueprint can come in handy. And again, if you don’t know what that is, if that term is familiar to you at all, make sure you go back and check out episodes 184, as well as, 185 so that you can be brought up to speed on what a business design blueprint is. But here’s the important thing to remember: from your business design blueprint, you have a listing, a hierarchy, if you will, or a reporting structure of all of the different roles within the company. Go ahead and take that document. Look at it as a reference so that you can understand who should have access to any paper file type that you designated as being private. For example, HR files, pay personnel files on each of your team members. That’s not something that everyone should have access to. So that certainly would not be public. It would be private, but considering that it is a private file type, of all of the people on your team, who should actually have access to that?
So that’s how I want you to start thinking about how to designate, who would have access to certain private files and again, using your business design blueprint as a guide for determining who in fact should have that access.
Step number 5, determine optimal storage. So what you want to do at this point, remember you have all of your index cards spread out across this large flat surface or very large table that you’re using. And now I want you to take a different color pin or marker, if that’s what you’re using. And I want you to write down the best optimal storage solution for each paper file type. So storage locations can include things like file cabinets, binders, bookshelves, and you might also even want to write the word scan because it’s very possible that you might be holding onto some information that’s fairly old and you really don’t need to keep it in paper format anymore, but you don’t want to lose the information altogether. So you might want to designate it as something to scan that you would later shred.

Step number 6, select the best security option. Again, you still have your index cards spread out against that large flat surface, write on each of those index cards, using another different color ink, the best way to secure each of these storage types that you’ve identified. Things can include combination locks.
For example, if it’s some type of a locked cabinet that you want to keep it in, it could be a safe deposit box at a bank that you want to keep certain paper records inside of. You might also want to invest in fireproof and or waterproof file cabinets. Like the ones that Karen and Sharon Benoit used for their mental rehabilitation facility. You can also just include the fact that you’ll just have certain files. They might not be in locked file drawers, but they might be kept in a locked room that only certain people again would have access to.
Another option is also offsite document management vendors. And again, that might sound familiar if you listen to the story of Karen and Sharon Benoit because that’s ultimately a solution that they also invested in.
Step number 7, transfer all of this information that you’ve written, that you’ve diligently written on these index cards into some type of a table or a matrix format and you can do this in a spreadsheet program. And by the way, you don’t have to use a spreadsheet program. You can also use some type of a word processing program like Microsoft word or Google docs, for example. But the point is this, you want to have this table where in that top row, you’re going to have a separate column for naming, security levels, storing, retaining, purging, archiving, and destroying a file. So that’s going to give us, let’s see 1, 2, 3, 4, 5, 6, 7. You’re going to have, and I’m going to say eight, and I’ll tell you why I’m saying eight columns. You’re going to have eight columns, seven of which I just named. And the first column is actually going to be reserved for the name of the type of paper record file. Okay. So you’re going to take a look at all of your index cards. You’re going to have a separate table per department. So if we’re looking at a management department, for example, you’re going to look at all of the paper file types that you have on the table written on those different index cards. And you’re going to write each file type in, into that first column on your table.
And then you can start populating the information of what’s the naming convention for these types of files, or how will you secure it? How will you store that particular type of paper record? How long will you retain it? How, at what point do you decide to purge it? How long does it, if it has to be archived for legal purposes, what’s that archival period? And at what point are you actually allowed, again, legally to destroy a particular type of paper document?
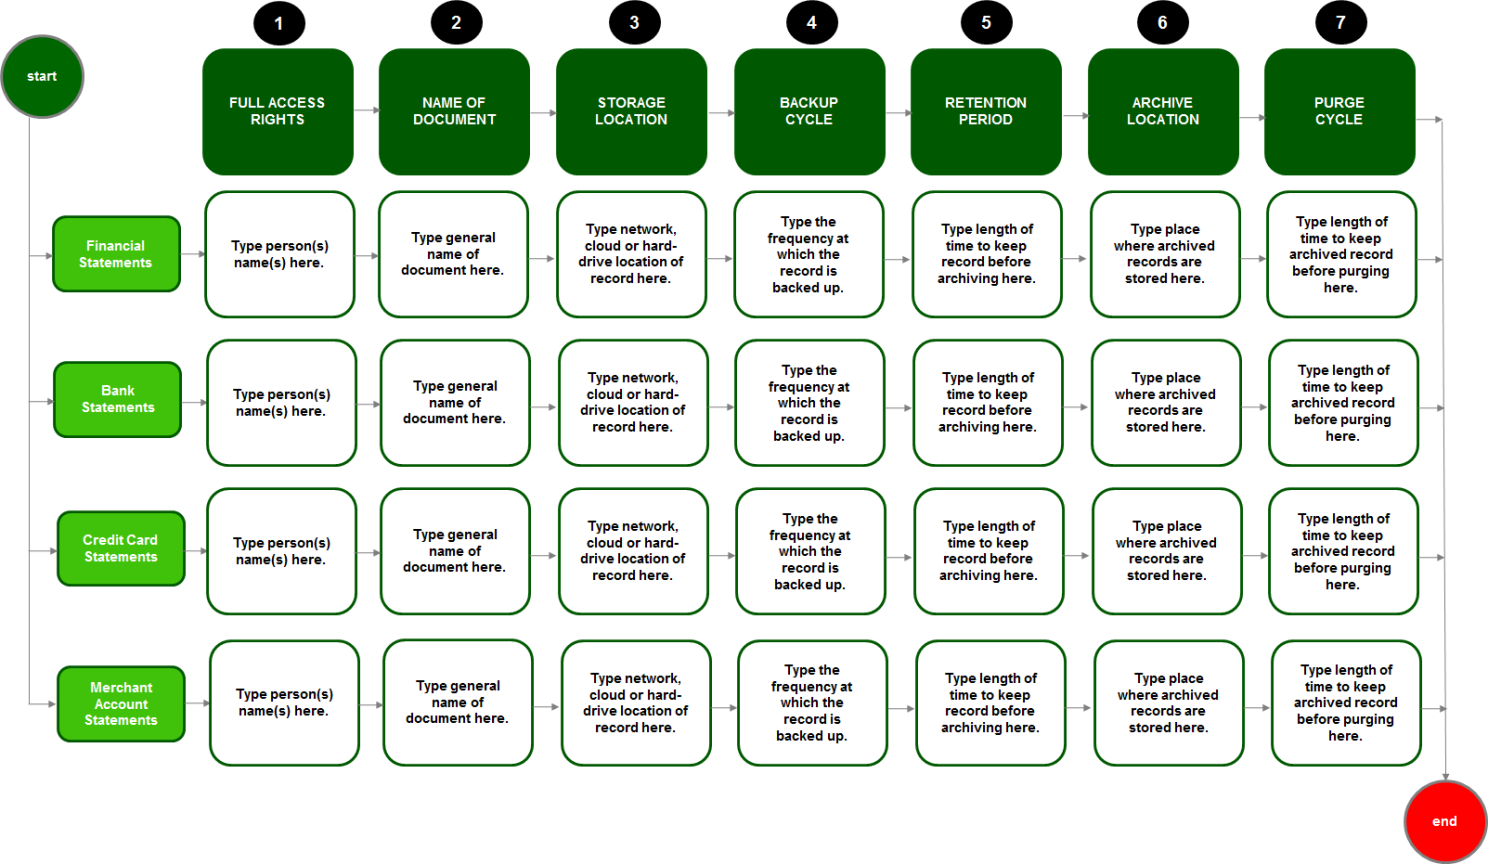
Now I’ve included what, a picture of what this matrix or table looks like. You can click on the resources link in this episode’s description, so that you can see what it looks like if you want a visual idea so that you can create this on your own. But once you filled out all of the information and your matrix is completely filled, go ahead and print it because you’re going to need to reference it during the next step.
And that next step is step 8, rearrange and organize your paper records. This is you’re literally about to start getting your hands dirty, so to speak.
Now, depending on the volume of physical records that you have, you want to start opening up as many of those empty banker’s boxes that you have, or those file storage boxes.
And at this point, you’ll take that extra set of index cards that you have with the names of either the departments or the file types. And you want to tape those on the outside of these boxes that you just opened. And in some cases, you might want to place a set of those empty hanging file folders inside of each of these boxes. And what’s going to happen is as you start to work your way around a particular workspace or office, you’re going to put that information into the appropriate box that’s labeled.
Now, you’ll also going to want to have a box labeled for trash, another one for scan, and then another box where you’ll keep everything that needs to be shredded. And again, shredding is for information that has probably reached a shelf life. You just don’t need it anymore, but you can’t just throw it away. It actually contains sensitive or confidential information that requires shredding prior to just discarding it.
Now, at this point, I want you to choose one corner or one spot in your workspace, gather a small stack of papers or these paper file types, and use that as your starting point and carefully sort through every single one of those paper records and determine whether to keep it toss it, scan it or shred it. Now for paper records that you want to keep, look to see which department that records content, excuse me, belongs to and place it in the appropriate box. Now you can fix a sticky note on the outside of the hanging file folder to indicate what type of paper record it actually is if you’d like to do that.

And you’re just going to keep repeating this process until you’ve sorted through all paper records within that workspace or that office. And if you’re in an actual office, I suggest moving around in a clockwise direction until you’ve covered every area of that office. Then I want you to go through each box’s contents and using your printed matrix as a guide, start putting these paper records in their new “home”. So you’ve already identified the optimal storage solution.
So you want to make sure if you designated this to go inside of a, in a locked cabinet, put it inside of that locked cabinet. If it’s a book and it belongs on the bookshelf, that’s where you want to place it. If it’s something that you have designated that it needs to be in some type of a safe or a safe deposit box at a bank, make sure you start putting everything where it belongs. And even if you decided that some information belongs in a binder, go ahead and start putting that information into the binder.
Step 9, create permanent labels. Now, once you start moving things around and rearranging what you did in step eight, once everything is in place, don’t create permanent labels just yet. I want you to give yourself some time to test the new locations of all of these paper records, make sure that everyone else on your team knows where things have temporarily been shifted to and start to make observations. And if some things just don’t seem to make sense, then just try something else. But once you’re pretty confident that you’ve selected the best location and the optimal storage type for each record, paper record, then you can go ahead and start creating these permanent labels.
Again, these labels are going to be color coded. Remember back in your business parts analysis exercise. One of the things you did is in addition to identifying your departments, you also color-coded those departments. So if you designated management as blue and you decide that there’s some paperwork that belongs to management, but you want to keep some of it in a binder consider buying a blue binder, or you might have a white binder with a blue label on the spine of the binder, or it could be a black binder with a blue, a blue label on the spine of the binder. The point is try to implement some type of color coding system.
Now, if it’s actual paper files and you want to keep it inside of a hanging file folder in a file drawer, for example, there’s a labeling system that I use called smead viewables. That’s S M E A D viewables. It is a beautiful file labeling system. I’ve been using it for many, many, many years. My clients absolutely love it. It gives you such a really clean, crisp look to your paper files and everything is color coded. It looks really nice, and it can take a while to set that up. So that’s why I’m really encouraging you before you commit to using something like that or labeling anything for that matter. Just make sure that you’re comfortable with where everything is going to be moving forward.
Now, step 10, our final step: share and maintain the system. Here’s where you’re going to take your after shots, your after picture. And it’s always fun to compare those before and after shots of your office or your workspace, and make sure you share this new paper records management system with your team. If they’ve been participating in the exercises with you all along, it won’t be a shock to their system, but make sure that they understand that these are now the expectations of how you will maintain paper records and that they’re all responsible for adhering to the maintenance of the company’s paper records.
And finally, just start to evaluate whether right then and there, or at some point in the future, if it makes sense to invest in an official document management solution, you may not have a documentation intensive business, but for some companies, especially those that are heavily regulated, they do. And so it might make sense at some point in the future to invest in a document management solution. It’s more expensive because it’s customized to your company’s specific needs, but again, as your company continues to grow and scale, and the volume of that paperwork starts to increase, it again, might make more sense for you to go ahead and make that type of an investment.

With more people working from home, physical space might be at a premium for you. By the time you and your team complete all these steps, you’ll have a decluttered office or workspace with paper files that are color-coded, organized and easy to find. In fact, some of what I just described is like the 5S model from the lean framework for process improvement.
And I’ll explain more about that in this audio masterclasses final episode, but for now, just know that the amount of time it takes to create your paper records management system largely depends on your and your team’s availability to do the exercises I just described as well as the amount of paper records to review. It may have surprised you to hear me mention scanning, especially since we’re talking about physical records and not electronic or digital records. Now here’s the deal. I certainly don’t advocate for keeping paper records around indefinitely unless it’s required. And even in that case, consider investing in offsite storage. The reality is that once the retention period for certain paperwork has expired, you really should not risk maintaining the hard copy. Anything can happen, whether it’s a natural disaster and I keep thinking about receipts. Whenever I think about not keeping certain paperwork around forever, because the ink on receipts can actually fade. So just keep things like that in mind, once it’s reached its retention period, especially if you are required to keep certain paper records around for a certain period of time, once it’s reached that retention period, go ahead and scan it. That way you can be sure to preserve it and you can continue storing it electronically.
Once you document your company’s paper records management system, here’s some of the things that you will experience. It’ll reduce the amount of time that it takes to locate physical documents. It also puts you in a position to pass industry audits, as well as certifications. It creates transparency and record-keeping, and it formalizes the checking in and out of shared physical documents. And last, but certainly not least, it also enables you to provide proof of certain transactions as well as legal paperwork like signed contracts.
This completes your fourth lesson in creating business infrastructure. At this point, you have a clear, consistent way for: one, identifying the work to perform and who will perform it; two categorizing that work in two departments; three, establishing a reporting structure based on those departments and roles and; four, organizing digital and physical assets. So that information required to perform the work is protected and easy to access.

Did you find this lesson helpful? If so, please leave a five-star rating and a review. If you want more details about creating a paper records management system for your organization, then click the resources link in this episode’s description. It’ll lead you to our website businessinfrastructure.TV. That’s where you can learn more about my book that this masterclass is based on.
It’s called, Behind the Facade: How to Structure Your Company Operations for Sustainable Success. And I wrote it specifically for you, the owner, manager or consultant of a fast-growing small business. But that’s not all, when you click the resources link in this episode’s description, you’ll also discover more about our services and how to join our mailing list for more tips and special offers. There’s also articles and case studies that you may find helpful in creating your paper records management system. You can even peek at what the matrix looks like.
Coming up in the next episode, you’ll meet another set of co-founders. Their new found fame from a TV show brings in more business, but at the cost of their existing clientele. If they’re not careful, that same fame can be used against them. They need to act fast and restore what was once a stellar reputation. This needs to happen before the next season of their show airs. How will they do it?
Stay tuned to find out. Until then, keep operating smoothly.
Thank you for listening to Business Infrastructure, the podcast about curing back-office blues with Alicia Butler Pierre. If you like what you’ve heard, do us a favor and subscribe, leave a rating and review. And more importantly, share with your colleagues and team members who could benefit from the information. Join us next week for another episode of Business Infrastructure with Alicia Butler Pierre.